Lampshade Lust Part Deux

Pin It In the end I went with a black paper to line the inside of my new lampshades instead of a patterned wallpaper. I found this contact paper at a local hardware store. It has a slight irregularity to the black almost like paler black spots or marbling on it that I really like. Its a peel and stick and doesn't need any additional glue to adhere to the lampshade interior. It cost me about $6 for this roll, I only needed one for two lamp shades.

Next I picked a starting point on the lampshade, I chose the seam so I could remember it easily.  This will also be where you start when you are peeling and sticking later. Use a small piece of tape to hold it in place. I laid out my contact paper from the back, so I could clearly see the pencil marks I was about to make.
Now roll the lampshade almost like you are rolling a giant burrito and mark where the lampshade rolls with a pencil on the contact paper. My drum shade was a slightly different diameter on top than it was on the bottom so rolling it like this was essential to getting accurate pencil marks.


Cut....

 Now from your starting point start peeling and sticking the opposite direction from the way you rolled your shade to get the pencil marks. I rolled my shade to the right, so I will peel and stick towards the left. The reason is because we marked it face down. Use a credit card to smooth out all the bubbles as you go.

I had to do some slight trimming with an Exacto knife.

 I had a small triangle I couldn't get because my contact paper roll wasnt wide enough....but no biggie its near the seam. Since most people face the seam towards the back of the lamp you will never notice it.

I cut a small triangle to fill the spot.


The shades look more purple with the contact paper in them. 


Lampshade Lust

Pin It I bought these two amazing brass lamps at Goodwill (one of my favorite places to hunt for treasure.) Love the Hollywood Regency aspect of them. At $10 each, and the fact there was a PAIR,  I couldn't resist. Typically, I try not to purchase anything for my home unless I have a space already selected for it in my mind. I decided the scale of these would go perfectly behind my sofa on a console table.

A tip for getting that Sharpie price tag off : a dab of hand sanitizer on a wash cloth should do the trick  (this does not apply to clothing or fabrics, be sure to test a small area first.)

I apologize for the poor photo quality...I took this picture with my phone.

 They didn't come with lamp shades so I hopped over to Target, they have a great selection there in different sizes. The rule I normally go by when selecting the correct size shade is the height of the lamp shade must be close to 40% of the lamp height when placed side by side.

 I wanted to switch it up a bit and add some color so I opted to dye the white drum shades. I got some purple dye from Joann's Fabrics because they have the most color selection, but you can find standard colors at most grocery stores. Keep in mind that one application of fabric dye will make the color a lot lighter than shown, to get a darker shade apply more in between drying times.
 Mix the whole package of powder with some warm water and add a couple dashes of salt to improve even coverage.
 You will want to do this outside.
 I brushed in one direction with a rough bristled paint brush to get a grainy look. I did this to help make the shades look a little more like linen and add some texture. If you want a more even appearance spritz the fabric on the lamp shade with water using a spray bottle so that it is moist, not dripping, and then apply the dye as shown.

 Let them dry for about 30 minutes to an hour.
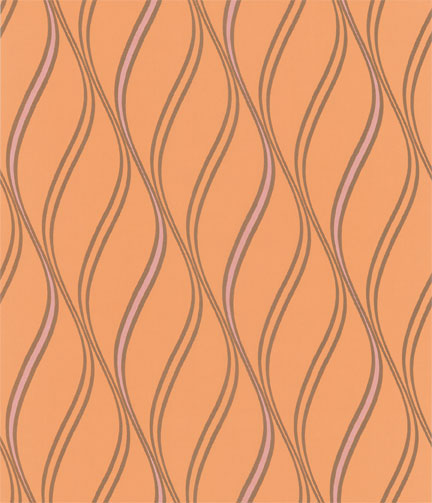
You can also line the interior of the lamp shade with wallpaper or silver contact paper if you are feeling adventurous. I have plans to use a black and white stripe wallpaper but I have not found the one I want yet. Some wallpaper stores have paper as low as $12 a roll. I like going to Allen Funks if I want immediate wallpaper gratification since they have so many in stock, or Sherwin Williams if I am willing to wait a few days. Here are some of my favorites from Sherwin Williams.


 I don't know if you can tell but I really like this one.

 Lately I have been obsessed with Ikat patterns and anything that reminds me of them.

 Miniature fretwork in two tone blue...heaven.

 Wouldn't this be adorable in a pink lampshade for a little girl's room or a nursery.
 Or you can use some of this amazing marbled paper from Paper Mojo.


Attach with a little bit of fabric glue and you have a custom lamp shade.

 They have kind of a pinkish purple hue to them when the lamps are on and I want to marry them.

Weekend Projects

Pin It
I worked all weekend on making my downstairs more organized and bright. At my house we have a book hoarding problem so when I was searching through my creative projects folder, I was drawn to built in bookshelves. I loved the way that some of them spanned entire walls. Usually a custom bookshelf will cost some serious money, and I just wasn't willing to spend that much. Especially in a house my family doesn't plan on staying in for long. 

Love the dark background in the bookshelves


This is what I decided to do. I have never been that fond of my entertainment center. I mean it works for what I need it to do but I can't say it is well made. We purchased the entertainment center about three years ago as a "temporary" solution for about $30 on craigslist. I also had two old bookshelves upstairs that I have kept in closets that I brought down to go on either side.


To make the bookshelves clean and bright, and to appear to be one unit. I decided to paint all three units with glossy white paint, similar to what you would paint the trim in your home. I chose a glossy because I love the way it reflects the light. That's my friend in the picture helping me. (Thanks Emma!)

Voila! I love the way it turned out. Finally, a place for all of our books. I think it definitely took on the look of a custom built-in. I decided to paint the backs of the shelves in the entertainment unit a dark color. You could also line the backs with a wallpaper for a whimsy look. I still need to finish behind the TV  and speakers but I wanted you to see the way it turned out. I spent $25 on supplies. You can get a similar look with any bookshelves you have as long as they are similar height. I am quite fond of the billy bookcases at Ikea. They look great lined up next to each other and they are already white.


Here is the before again


Eventually I will re-upholster this blue chair. I am thinking something in black and white.


Here's another little project I worked on. I got this small table in the clearance section of Homegoods for $7. Since the shape was good and it seemed sturdy I decided to buy it. 


Pink doesn't really go with anything downstairs so I spray painted it black in a matte finish so it would take on the look of wrought iron. Then to add a little sparkle I mixed copper and gold acrylic paints together to get a brassy look and painted little details. 


Happy Valentines!